Creating projects by using templates
Project templates let you create new notebooks from preformatted spreadsheets. A project template provides a basic format for spreadsheet projects and data entry forms.

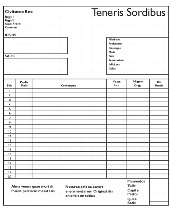
This is an example of a project template.
For information about creating a notebook from a project templates see “To create a notebook using a project template.”
You can view a list of all the Quattro Pro files you’ve worked. Quattro Pro can display project templates each time you open the application. If you plan to use a project template often, you can add it to the Favorites list. You can also change the description of a project, including its name.
To display a list of previous projects |
|
1.
|
|
Click File
|
|
2.
|
|
Click the Work on tab.
|
![]()
|
•
|
|
You open a project from list of previous projects by double-clicking on the project.
|
To display project templates when Quattro Pro opens |
|
1.
|
|
Click File
|
|
2.
|
|
Click Options
|
![]()
|
•
|
|
A check mark beside the command name indicates that this feature is enabled.
|
To copy a project template to another location |
|
1.
|
|
Choose the drive and folder where the template you want to copy is stored.
|
|
2.
|
|
Click the file.
|
|
3.
|
|
Click Edit
|
|
4.
|
|
Choose the drive and folder where you want to paste the copied template.
|
|
5.
|
|
Click Edit
|
![]()
|
•
|
|
By default, WordPerfect Office X5 installs project templates at the following location (where “X” indicates the drive on which the WordPerfect Office X5 is installed):
|
|
•
|
X:\Program files\Corel\WordPerfect Office X5\Languages\EN\Template\Custom QP templates
|
|
•
|
|
By default, WordPerfect Office X5 saves user-created project templates at the following location in the user’s application-data folder:
|
|
•
|
Corel\PerfectExpert\15\EN\Custom QP templates
|
![]()
|
•
|
|
You can access the copied files by clicking File
|
To add a project to the Favorites folder |
|
1.
|
|
Click File
|
|
2.
|
|
Click the Create new tab.
|
|
3.
|
|
Choose a category from the Categories list box.
|
|
4.
|
|
Choose a project from the Projects list.
|
|
5.
|
|
Click Copy to favorites.
|
![]()
|
•
|
|
You can display items in the Favorites folder by clicking File
|
To change a project description |
|
1.
|
|
Click File
|
|
2.
|
|
Click the Create new tab.
|
|
3.
|
|
Choose a category from the Categories list box.
|
|
4.
|
|
Choose a project from the Projects list.
|
|
A description of the project appears below the Projects list.
|
|
5.
|
|
Click Options, and click Project properties.
|
|
6.
|
|
In the Modify a project dialog box, type new information in any of the following boxes:
|
|
•
|
Display name — to change the project name
|
|
•
|
Description — to change the project description
|