Changing the properties of a shape
Quattro Pro lets you modify any shape you create or insert. You can change the border style of a shape and add a shadow to the border.
Quattro Pro lets you fill a shape with a pattern, gradient, texture or picture. Once you fill a shape with a picture, or texture, you can modify the fill settings.
You can make shapes in a spreadsheet transparent. One way to use a transparent shape is for creating a watermark on a spreadsheet. If you mark the shape as transparent, the background color won’t display.
To change the border style of a shape |
|
1.
|
|
Select a shape.
|
|
2.
|
|
Click Format
|
|
3.
|
|
Click the Line tab.
|
|
4.
|
|
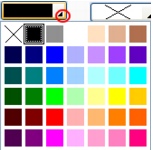
Open the Style picker, and click a border style.
|
To add a shadow to the border of a shape |
|
1.
|
|
Select a shape.
|
|
2.
|
|
Click Format
|
|
3.
|
|
Click the Shadow tab.
|
|
4.
|
|
Click a direction on the Direction of shadow palette.
|
|
5.
|
|
Open the Shadow color picker, and click a color.
|
|
If you want a transparent shadow, enable the Use a transparent shadow check box.
|
![]()
|
•
|
|
You can change the width of the shadow offset by typing a value in the Side-to-side offset box or the Up-and-down offset box.
|
To fill a shape |
|
1.
|
|
Select a graphic.
|
|
2.
|
|
C
lick Format |
|
3.
|
|
Click the Fill tab.
|
|
4.
|
|
Click Pattern
|
|
5.
|
|
Click a pattern on the palette.
|
|
6.
|
|
Open the Fill color picker, and click a color.
|
|
7.
|
|
Open the Pattern color picker, and click a color.
|
|
If you want to reverse the colors of the pattern, click Reverse colors.
|
To modify texture settings of a texture-filled shape |
|
1.
|
|
Select a shape.
|
|
2.
|
|
Click Format
|
|
3.
|
|
Click the Fill tab.
|
|
4.
|
|
Click Texture
|
|
5.
|
|
Click Texture settings.
|
|
6.
|
|
In the Texture settings dialog box, enable one of the following options:
|
|
•
|
Anchor the texture to the page — repeats the texture in relation to the entire page so that as you move or size the object, it shows a different part of the texture
|
|
•
|
Anchor the texture to the object — repeats the texture in the object so that the texture remains with the object as you size or move it
|
|
7.
|
|
In the Fill method area, click one of the following buttons:
|
|
•
|
Alternating — fills every other enclosed area
|
|
•
|
Winding — fills the enclosed areas, including overlapping areas
|
To modify the picture settings of a bitmap image in a shape |
|
1.
|
|
Click a shape.
|
|
2.
|
|
Click Format
|
|
3.
|
|
Click the Fill tab.
|
|
4.
|
|
Click Picture
|
|
5.
|
|
Click Picture settings.
|
|
6.
|
|
In the Picture settings dialog box, enable one of the following options in the Layout area:
|
|
•
|
Tile — displays the bitmap image in a tiled pattern
|
|
•
|
Brick horizontal — displays the bitmap image in a horizontally offset brick pattern
|
|
•
|
Brick vertical — displays the bitmap image in a vertically offset brick pattern
|
|
•
|
Stretch/shrink to fit area — enlarges or reduces the bitmap image to fill the shape
|
|
•
|
Scale to fit area — adjusts the bitmap image proportionally to fit the shape
|
|
•
|
Stack — stacks the bitmap image on top of itself
|
|
7.
|
|
In the Fill method area, click one of the following buttons:
|
|
•
|
Alternating — fills every other enclosed area
|
|
•
|
Winding — fills the enclosed areas, including overlapping areas
|
To make a shape transparent |
|
1.
|
|
Click a shape.
|
|
2.
|
|
Click Format
|
|
3.
|
|
Click the Fill tab.
|
|
4.
|
|
Click Pattern
|
|
5.
|
|
Click Pattern settings.
|
|
6.
|
|
In the Pattern settings dialog box, enable one of the following options in the Transparent color area:
|
|
•
|
Fill color — makes the fill color transparent
|
|
•
|
Pattern color — makes the pattern color transparent
|
|
7.
|
|
In the Fill method area, click one of the following buttons:
|
|
•
|
Alternating — fills every other enclosed area
|
|
•
|
Winding — fills the enclosed areas, including overlapping area
|
![]()
|
•
|
|
You can make only one color in a pattern transparent.
|
